I recently had a situation where the validate_unique method from my model wasn’t running. This is because one of the fields involved in the unique test wasn’t included in the form. I tried many things in the form and the view before landing on this solution: I first injected the field into the object of the UpdateView, then ran the test in the Form in _post_clean.
models.py

class Link(ModelBase):
	id = models.UUIDField(primary_key=True, default=uuid.uuid4, editable=False)
	title = models.CharField(max_length=200,blank=True,null=False)
	url = models.URLField(max_length=400,blank=False,null=False)
	profile = models.ForeignKey('Profile',null=False,blank=False,on_delete=models.CASCADE)

	class Meta:
		unique_together = ('url','profile')

	class Admin:
		pass
forms.py

class LinkForm(ModelForm):

	def _post_clean(self):
		''' Be sure that the instance validate_unique method is run including the profile field '''
		super(LinkForm,self)._post_clean()
		try:
			self.instance.validate_unique(exclude=None)
		except ValidationError as e:
			self._update_errors(e)

	class Meta:
		model = Link
		fields = ['title','url']
views.py

class LinkUpdateView(UpdateView):
	model = Link
	form_class = LinkForm

	def get_form_kwargs(self):
		''' Add profile to self.object before kwargs are populated '''

		if hasattr(self, 'object') and self.object and self.profile:
				self.object.profile = profile

		kwargs = super(LinkUpdateView, self).get_form_kwargs()

		return kwargs
Is there a better way to do this that doesn’t involve overriding an internal function?
Got any help for me? Please post an answer here or on SO. I’ll share the solution here once I get one.
My first rule of home automation is not to ask why I need something automated, but if it is possible. It’s a hobby after all. However, with the garage door we had an actual need. (Plus, I could do it!)
The whole point of having a garage door is so we can close it when access isn’t needed. Otherwise there would just be a hole in the wall. However, in my house we have this bad habit of not closing it – sometimes when we are home and sometimes when we leave. This project was inspired by an all night “open to all” garage.
There were also a couple of articles that outlined how this could be done:
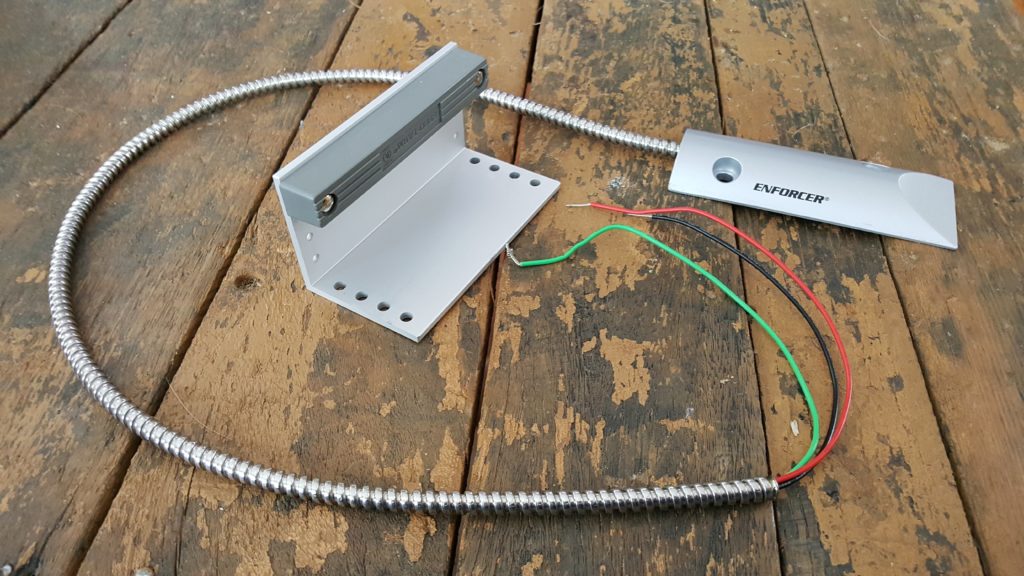
UPDATE: I’ve replaced the Magnetic Reed Switch with a much hardier commercial model. The Enforcer works much better!
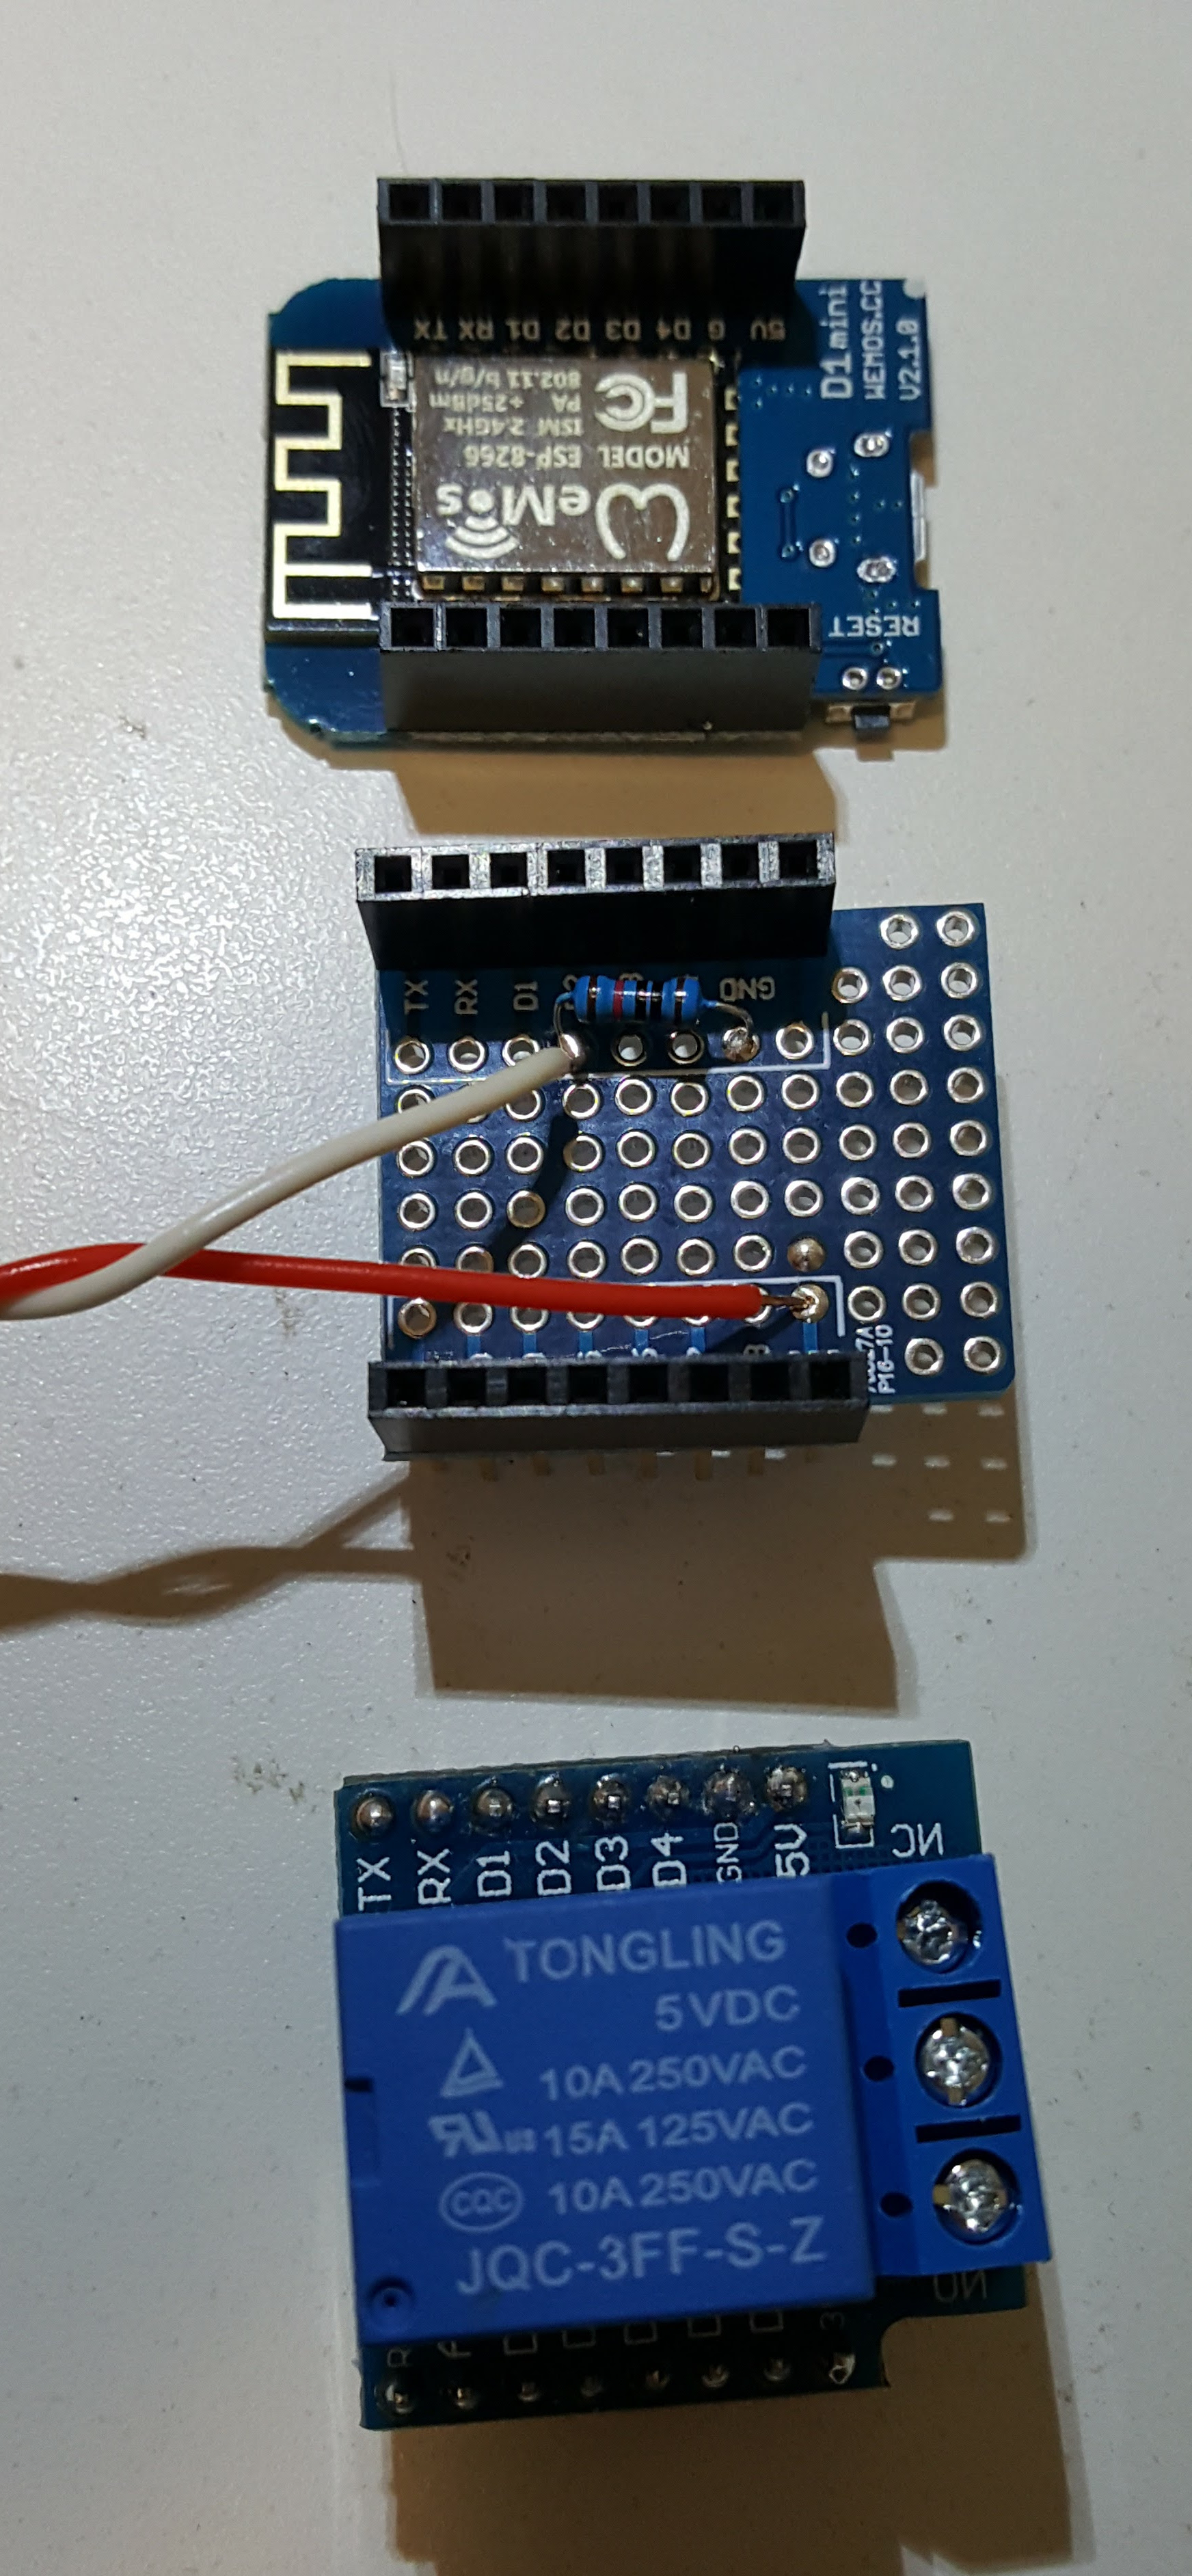
One could substitute other WiFi enabled project boards, such as the Node MCU. I used the Wemos partly because of the availability of the shields which make for a compact build. The ProtoBoard shield was not required, but helped me get past my substandard soldering skills.
Pin Layout:
5V – Power to the relay
3.3V – Power to the BMP280
GND – Ground
D1 – Relay control (this is hardwired in the shield)
D2 – Reed switch
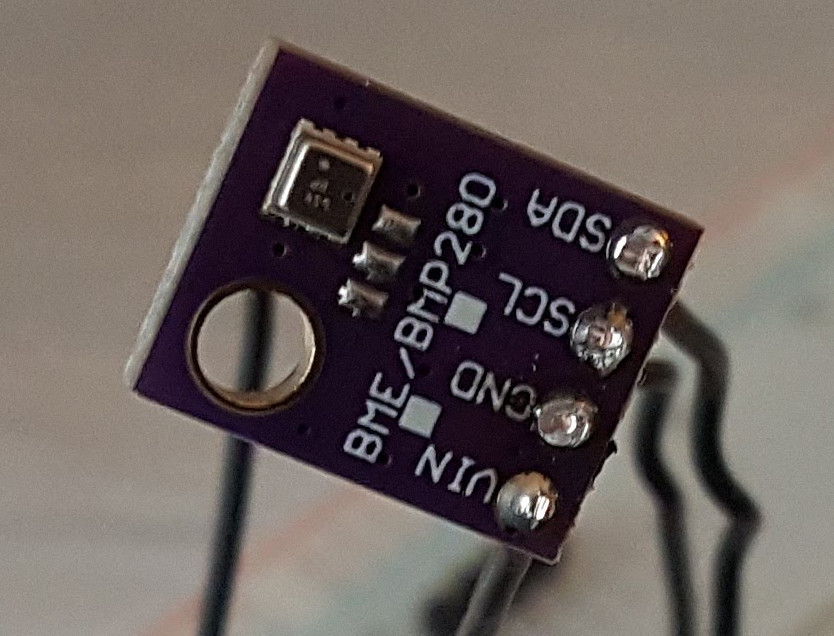
D5 – SCL for BMP280 (not the default pin)
D6 – SDA for BMP280 (not the default pin)
I don’t usually solder all of the pins on the D1 shields; just those that are needed. However, there is no penalty for completeness. Be sure all of the pins listed above are soldered in all headers.
The Code
This code is doing three things each cycle through the loop. First, it checks the state of the door and reports any changes. Next, the temperature and pressure are checked and reported. Finally, the client loop will look for any commands from MQTT and handle accordingly.
If the door is found to be open, it is not reported right away. Instead a counter is incremented, and only after five consecutive readings of open is that status returned. The goal here is to ignore spurious readings.
A return value of closed is assumed correct and set on first reading.
A change in the door status is immediately reported via MQTT. The process also reports the status each minute regardless of a change to ensure Home Assistant is always in sync.
Report Temperature and Pressure
This code is based on the example program that came with the library by github user mahfuz195 (found here). The readings are returned in JSON format using a library by github user bblanchon (found here)
Updates are limited to once every 10 minutes. No need to overwhelm Home Assistant with readings.
In the begin() function for the BMP, I specify which pins to use for the I2C interface. On the D1 Mini these default to D1 and D2, but those pins were already in use by the relay and reed swtich. D5 and D6 are recruited to take the job.
Callback
The callback routine catches a MQTT message. The payload of “OPEN” is the only command that will “push” the button – closing the realy for 6/10 of a second.
Other Code Features
I’m using a few other libraries in this program. WiFiManager handles the WiFi connection, storing the credentials in nonvolitile memory. It is important to note that WiFiManager will open a WiFi acces point if no credentials are found or the connection attempt fails. Connect to this AP using a laptop or phone, access 192.168.4.1, and follow on the onscreen instructions to setup your WiFi information.
ESP8266HTTPUpdateServer accepts program updates over the air. No need to climb up a ladder to connect your laptop!
Wiring the Reed Switch
The Enforcer – Commercial Garage Door Magnetic Switch
Using a bell wire pair, connect one wire to the 3.3V pin, and the other to D2. Also, I’ve added a pull-down resistor between D2 and ground. The pull-down keeps the signal from “floating” (sending an unknown level). On the other end, use the NO (normally open) terminal for one wire and the common terminal for the other.
Wiring the Temperature Sensor
Connect the four pins of the BMP280 sensor as labeled. Rember that my code uses D5 and D6 for SDA and SCL, not the defaults of D1 and D2.
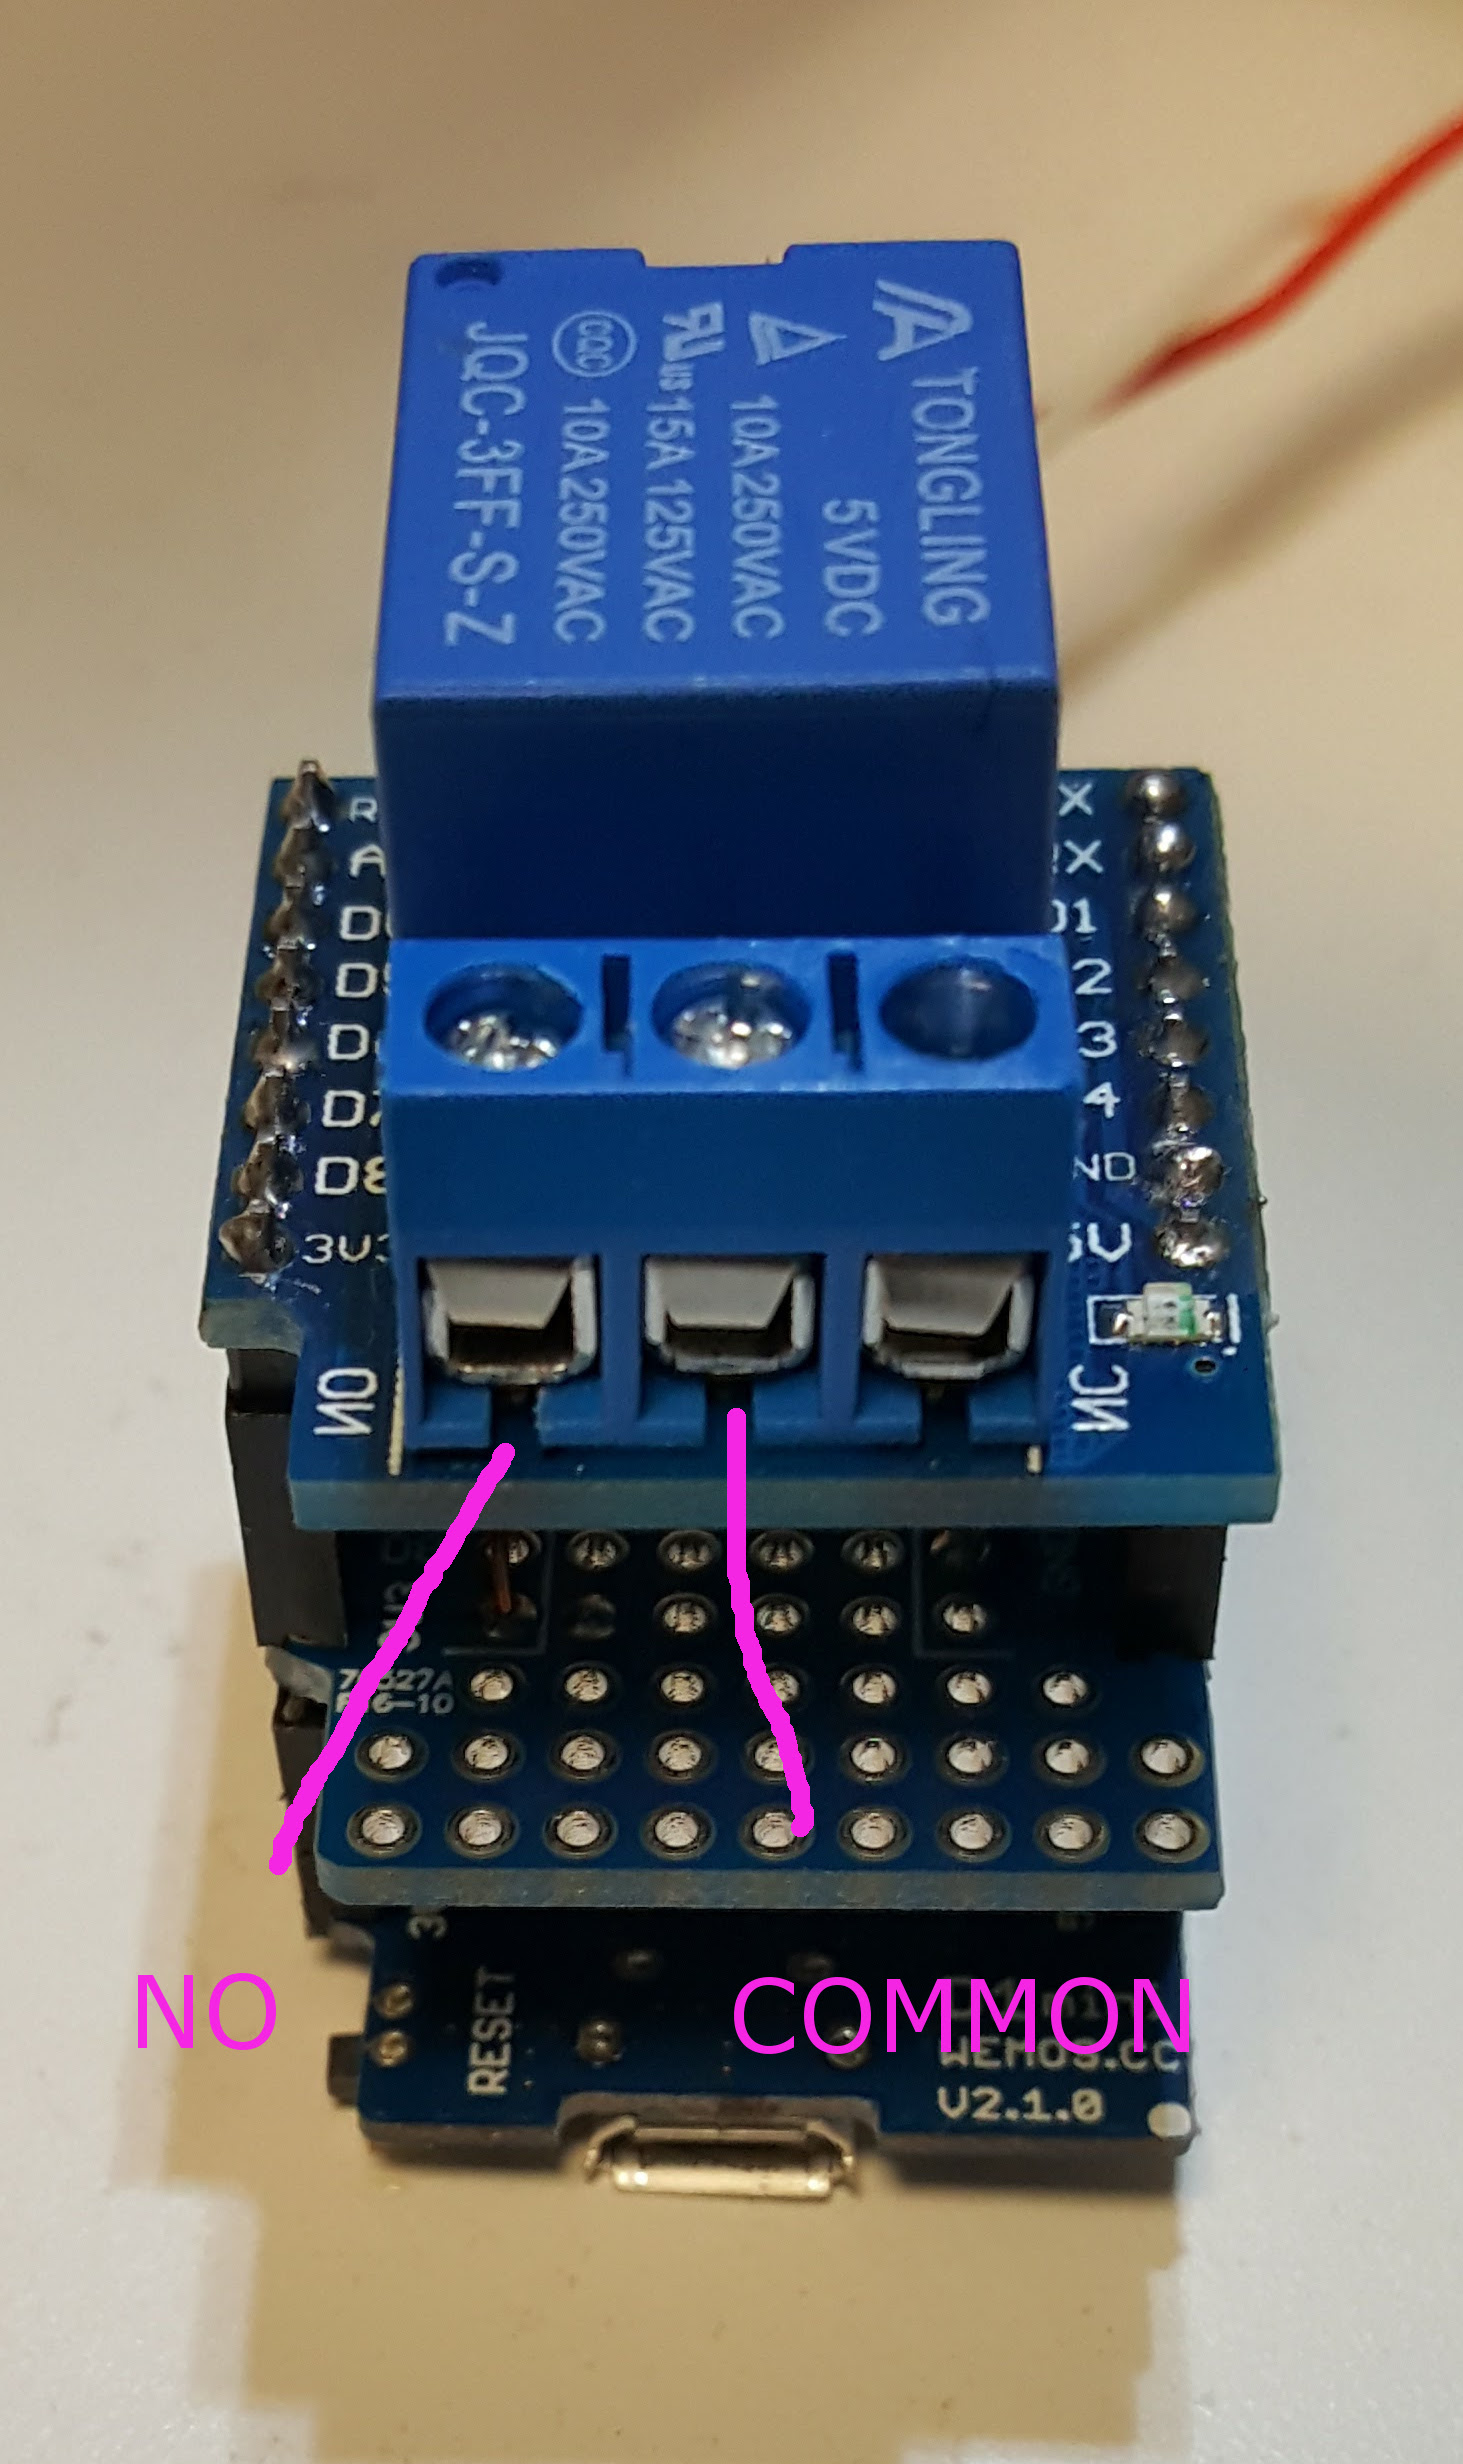
Wiring the Relay
Your garage door opener should have at least four terminals – two for the open button and two for the safety circuit. Follow the wires from your open button to find the two you need. Otherwise, use a short piece of wire to short the pairs of terminals together until the door opens.
Run a pair of bell wire from the opener terminals to the relay. Use the common terminal and the NO terminal on the relay.
Set Up Home Assistant
The GitHub repository includes a configuration file for Home Assistant. Integrate these entries into your configuration.yaml file. Note that this file itself is not a complete configuration file.
Once again the GitHub address is: https://github.com/dashdrum/garage_door