
An article on Steve’s Internet Guide got me thinking about MQTT when on the road. No, seriously! Here’s my situation:
I have a sensor that reports the usual temperature and humidity inside my travel trailer, and it also provides the same information from inside the RV refrigerator thanks to a Ruuvi tag placed within. (Code for this sensor using ESPHome can be found in my Github repo.)
This sensor connects to my home WiFi network when the trailer is parked in the driveway, but obviously not when we are on a trip. We can use the Ruuvi app to read the fridge temperature using BLE when inside the unit, but if we are even across the campsite or farther away – no go.
Anyone who has relied on an RV refrigerator to keep their food safe knows that they can be less than reliable. Knowing the temperature is rising gives us a chance to take action before food items are spoiled.
My goal with this project was to provide a way to monitor the refrigerator temperature when the trailer is parked away from home, and to use Home Assistant to issue alerts that will inform us of any temperature issues.
WiFi First
Before I get into the MQTT configuration, let’s make sure we connect to WiFi when away. My trailer has a travel router that can bridge to RV park networks, a hotspot, or a tethered smartphone to bring Internet access inside. ESPHome allows one to set up more than one set of WiFi options, so I use this code:
wifi:
networks:
  - ssid: !secret rv_ssid
    password: !secret rv_password
  - ssid:  !secret wifi_iot_ssid
    password: !secret wifi_iot_password
    manual_ip:
      static_ip: $ip_address
      gateway: 192.168.37.1
      subnet: 255.255.255.0
      dns1: 8.8.8.8
      dns2: 1.1.1.1
On the home network I use a static IP address to make connection time fast. This, along with deep sleep, helps limit the time the device is awake when using a battery operated-sensor.
MQTT in the Wild
In order to collect the telemetry data from this sensor when away, I set up a free account with the service flespi. However, one can use any one of many services offering an MQTT broker service, as my solution is simple and standards-based. Thanks to the good folks at flespi for making this service available for trials and hobbyists.
Flespi assigns a long token for authentication, and this can be provided as either a username or password when logging in. Here is my code:
  mqtt:
    id: mqtt_client
    broker: !secret flespi_broker
    port: !secret flespi_port
    username: !secret flespi_token
    birth_message:
      topic: $device_name/birthdisable
      payload: disable
    will_message:
      topic: $device_name/willdisable
      payload: disable
(Sorry for all the secrets; gotta keep things private and portable)
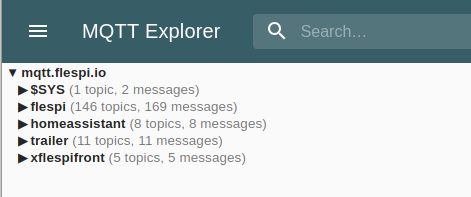
MQTT Explorer shows the broker contents once the device is connected and transmitting.
The Bridge
Finally, we need to make a safe connection between the local broker and the public one. I use the Mosquitto broker locally, and it offers an MQTT bridge functionality that makes this task easy.
What we are going to do is have the local broker subscribe to the topics created on the external broker. In my example, the sensor uses topics with the prefix “trailer/”. In addition, ESPHome uses a topic prefix to send configuration information to Home Assistant. The default topic for this is “homeassistant/”.
To define these subscriptions, we will modify the mosquitto.conf file to connect to the external broker and subscribe. Add this code to your file:
#  Bridge to public broker

connection <MQTT connection name>
address <broker url or IP with port number, such as example.com:1883>
remote_username <use your token here>
bridge_insecure false
try_private false
bridge_protocol_version mqttv50

topic homeassistant/# in 0
topic trailer/# in 0
The top section of this snippet sets up the broker to broker connection. Your version may be different if using another service. Note that I am using an unsecured connection; you may wish to beef things up.
The lower section is what defines the subscriptions. The topic “homeassistant/#” uses the octothorpe wild card symbol to grab anything under this topic prefix. The configuration information for the sensor is found here.
The “trailer/#” topic is used to identify the sensor readings. Whenever something is posted to this topic prefix, it will be retrieved through the bridge to the local broker – ready for consumption by Home Assistant or any other user.
Wrap Up
I was surprised that I could do this without any additional cost and limited coding. Now that the data is feeding to Home Assistant, I can write automations, alerts, etc. to keep us informed.
Thanks again to Steve of Steve’s Internet Guide for the inspiration and examples.